My daughter was super sensitive and prone to nightmares when she was young. Many of the movies her friends watched, like Finding Nemo and 101 Dalmations, terrified her. And while she loved the idea of receiving bags full of free candy, even our church’s Trunk-or-Treat festivities caused her to cling to me in tears. Yet when she listened to her friends talk about their Halloween plans and the costumes they planned to wear, she often felt excluded from the conversation and like she was missing out. Wanting to help her connect with her peers in a way that she actually found pleasant, I found creative, non-frightening activities for her and the neighbor kids to enjoy.
Perhaps you can relate or are simply looking for more positive alternatives to some of the darker images often displayed this time of year. If so, here are 10 non-spooky ways you can celebrate Halloween.
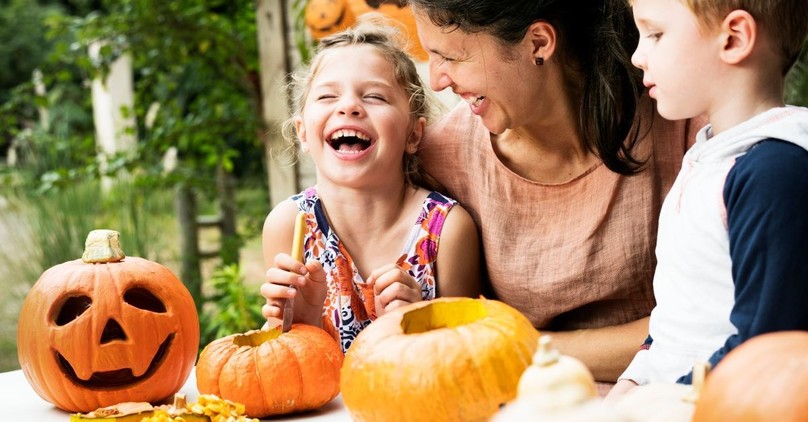
Photo Credit: © Getty Images

1. Make candy-filled mini-pumpkins for friends.
Supplies:
– orange and green tissue paper
– tape
– suckers and candy of your choice
You may want to dress these up with googly eyes. You may also want gift tags for your kids to write their friends’ names or a kind note on.
Directions:
Cut the orange tissue into 10-inch squares and the green tissue into 1-inch wide and 6-inch long strips.
Place a handful of candy in the center of each square with the sucker, stick up, in the middle. (I used miniature tootsie rolls as I had a large number on hand.)
Close the tissue up around the candy, securing and taping it around the sucker stick.
Wind a green strip of tissue paper around the stick to hide it.
2. Create masquerade masks.
Supplies:
– card stock or crafting foam
– printer paper
– markers
– glitter pens
– scissors
– glue
– tape
– either wooden craft sticks, straws, or thin paper dowels
– colorful feathers
– various decorative stickers
Directions:
Draw a simple eye-glasses shape on printer paper, cut this out, and use this as your pattern. (You can also find “masquerade mask patterns” online to download and print or you can order pre-cut masquerade mask shapes from an online trinket and craft store.)
Use the pattern to trace out the mask shape onto the card stock or craft foam. Let your children cut these out then decorate them using whatever supplies (i.e. glitter glue, buttons, colorful feathers, etc.) you chose.
Once they are finished, have them tape the craft stick, straw, or dowel to one side for a handle.
Photo Credit: © Getty Images/Alek Zotoff

3. Throw a masquerade party.
You can begin the party by having children create their own masks using the instructions above. For additional activities, encourage them to plan, practice, and put on a show wearing their masks as they act out their storyline. Or, if you prefer, invite the children to create a drama first then craft masks for their respective characters.
You can also have them take turns acting out different animals or cartoon characters while the other children attempt to guess who they are. For snacks, you can serve mystery treats where you place a sample of each item you plan to serve in a shoebox, then have the children take turns smelling the item and trying to guess what it is.
4. Host a superhero party.
Supplies:
– star shaped sandwiches
– sugar cookies in gingerbread men shapes
– red, white, and blue colored frosting
– cake decorating candy
– masking or painters tape
Host a superhero party where children are encouraged to dress up as their favorite superhero. During the party, give each child a turn to display their superhero power(s). For snacks, make various sandwich varieties and cut these into star shapes. Before they arrive, bake gingerbread-shaped cookies, use food coloring to turn vanilla frosting red, white, and blue, and purchase candy stars or silver and gold balls and let the children decorate the cookies to look like superheroes.
Outside or in a large, open room, create feats for the children to conquer. For example, use masking or painter's tape to form a line on the floor, then invite the children to take turns standing with their toes behind the line and seeing how far they can jump.
In another game, the children can take turns leading a “superheroes” version of follow-the-leader where they walk, jump, skip, and tiptoe as their superhero would while the other children follow and mimic them.
Photo Credit: © Getty Images/Detry26
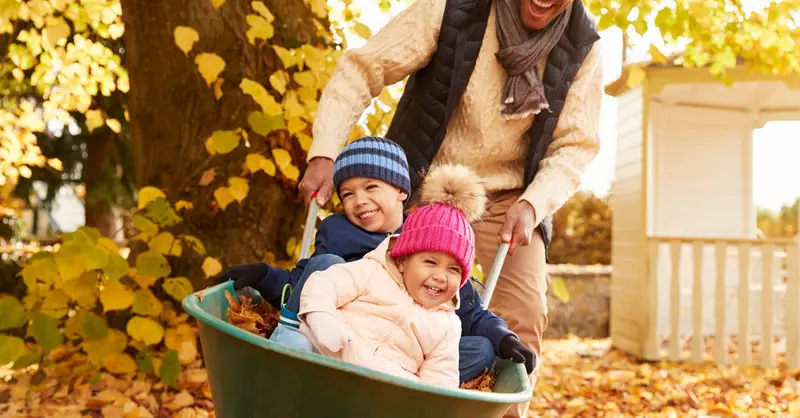
5. Take your kids on a wagon or wheelbarrow “hayride.”
Supplies:
– a wagon or wheelbarrow
– 1 hay bale
– optional decorating items
Fill a wagon or wheelbarrow with straw. (You can purchase a bale from your local craft store for $5-$10 dollars.) Your children might find it fun to decorate their hay-cart with ribbon, crepe paper, or strips of fabric. Then, let them take turns going for a ride, and if they are strong enough, pull or push one another around in the wagon or wheelbarrow.
6. Plan and perform “tricks.”
You can find some kid-friendly ideas online to get your children started or you can encourage them to come up with their own ideas. They can perform their tricks for one another, or neighbors.
Gather participants around a table and explain the plan (such as who they will be performing for). Then, encourage them to suggest trick ideas. As you brainstorm together, each idea will likely trigger more. Once everyone has suggested numerous ideas, encourage them to try out and practice a few. Then, together you can decide who to show your tricks to, and when.
Some examples include:
– For grandma and grandpa in person or via Zoom.
– For neighbors. If you know them well enough, you can go on a “trick-show” walk, where you stop by various homes. When the homeowners answer, have your children say, “A trick for you!” or something similar, then display their trick.
– With friends during a planned playdate.
7. Create a “follow the light” tunnel.
Supplies:
– large boxes
– masking tape
– scissors
Gather large boxes from your local appliance or super-mart store, open the top and bottom flaps, then connect the openings to form a tunnel. (Your children might enjoy helping or perhaps doing this themselves.) Create small holes at various corners to allow light in and serve as something of a guide. (Unless your tunnel is extensive, this is more for fun than necessity.)
You can also combine this with one of the party ideas above. For the Superhero-themed party, you can place a stuffed animal or doll inside or at one end of the tunnel and have each “superhero” take turns rescuing the item. For the masquerade-themed party, you could have the children pretend they are entering the deep halls of a castle.
Photo Credit: © Getty Images/monkeybusinessimages
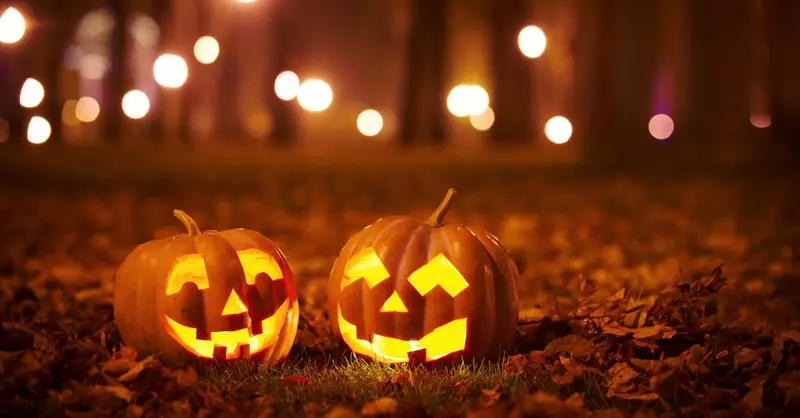
8. Candle-lit pumpkins.
This activity has two variations.
Supplies for using real pumpkins:
– numerous large pumpkins
– carving tools
– candles (battery or fire-lit)
Supplies for paper pumpkins:
– two-sided tape
– paper lunch bags
– orange and green construction paper
– scissors
– battery-lit candles
You or your children can scoop out the insides of numerous pumpkins and then carve a simple face within each. Place a candle (with flame or battery lit) inside each one and place these along your walk.
If you and your children would rather not mess with a real pumpkin, you can make some out of paper lunch bags and orange and green construction paper. Use the sides of a lunch sack as a guide to cut two rectangular strips from the orange construction paper. These will act as the sides of the pumpkin, will help hide the bag, and connect your main pumpkin shapes (the front and back) together.
Next, cut two pumpkin shapes from the orange paper, big enough to cover the front and back of the paper bag. Cut a large rectangle out of the front and the back sides of the bag to allow light to flow through.
Help your children draw and cut simple faces from the orange pumpkins they cut out and tape one over each rectangular window. For each pumpkin, cut two identical rectangles from the green construction paper. Place one on the top of each orange pumpkin.
Place a battery candle inside each bag then tape the top closed so that it is hidden behind the orange pumpkin shapes.
9. Create a miniature golf course throughout the house or in the yard.
Supplies:
– ping pong balls or wadded up paper (to avoid breaking anything)
– golf clubs (preferably miniature though any size will do)
– masking tape to mark out the course
Directions:
Set up your course then let the children take turns swinging until they get their ball in the desired “hole” or target.
10. Pumpkin Cookie decorating.
Supplies:
– sugar cookie dough
– one or two drinking glasses (or circle or pumpkin-shaped cookie cutters)
– orange and green-tinted frosting
– chocolate chips, and whatever other decorative items you choose
Directions:
Roll the cookie dough flat and have your children cut them into circle shapes using the opened ends of the drinking glasses or into circle or pumpkin shapes using cookie cutters. Bake as directed. Once they have cooled, allow the children to decorate them into smiling pumpkins.
Photo Credit: ©iStock/Getty Images Plus/sandsun
Originally published Tuesday, 12 October 2021.


